Introduction
Getting started
Build a small admin panel for products, from a new panel to a working list and form.
This guide takes a fresh install to a working admin area for products. It assumes you've finished the installation of Panels, and can sign in at /admin.
Create the model
php artisan make:model Product --migration
Give the table a few columns.
Schema::create('products', function (Blueprint $table) {
    $table->id();
    $table->string('name');
    $table->decimal('price', 10, 2);
    $table->boolean('is_featured')->default(false);
    $table->timestamps();
});
Then let those attributes be filled, and run php artisan migrate.
Create a resource
A resource connects a model to the panel.
php artisan make:xelqun-resource Product
This creates the resource and a policy, and your panel picks it up by itself.
Allow access
A resource shows nothing until its policy allows it. With no policy, or no such method, the answer is no.
Open app/Policies/ProductPolicy.php, and let your admins in.
public function viewAny(User $user): bool
{
    return $user->is_admin;
}
Do the same for view, create, update and delete.
Build the form
form() lists the fields of the create and edit pages.
use Xelqun\Forms\Components\TextInput;
use Xelqun\Forms\Components\Toggle;

public static function form(): array
{
    return [
        TextInput::make('name')->required()->maxLength(255),
        TextInput::make('price')->numeric()->required()->prefix('$'),
        Toggle::make('is_featured')->label('Featured'),
    ];
}
Validation comes with it. These rules run on the server every time, and errors show under each field.
Build the table
columns() lists what the list page shows.
use Xelqun\Tables\Columns\IconColumn;
use Xelqun\Tables\Columns\TextColumn;

public static function columns(): array
{
    return [
        TextColumn::make('name')->searchable()->sortable(),
        TextColumn::make('price')->money('USD')->sortable(),
        IconColumn::make('is_featured')->label('Featured')->boolean(),
    ];
}
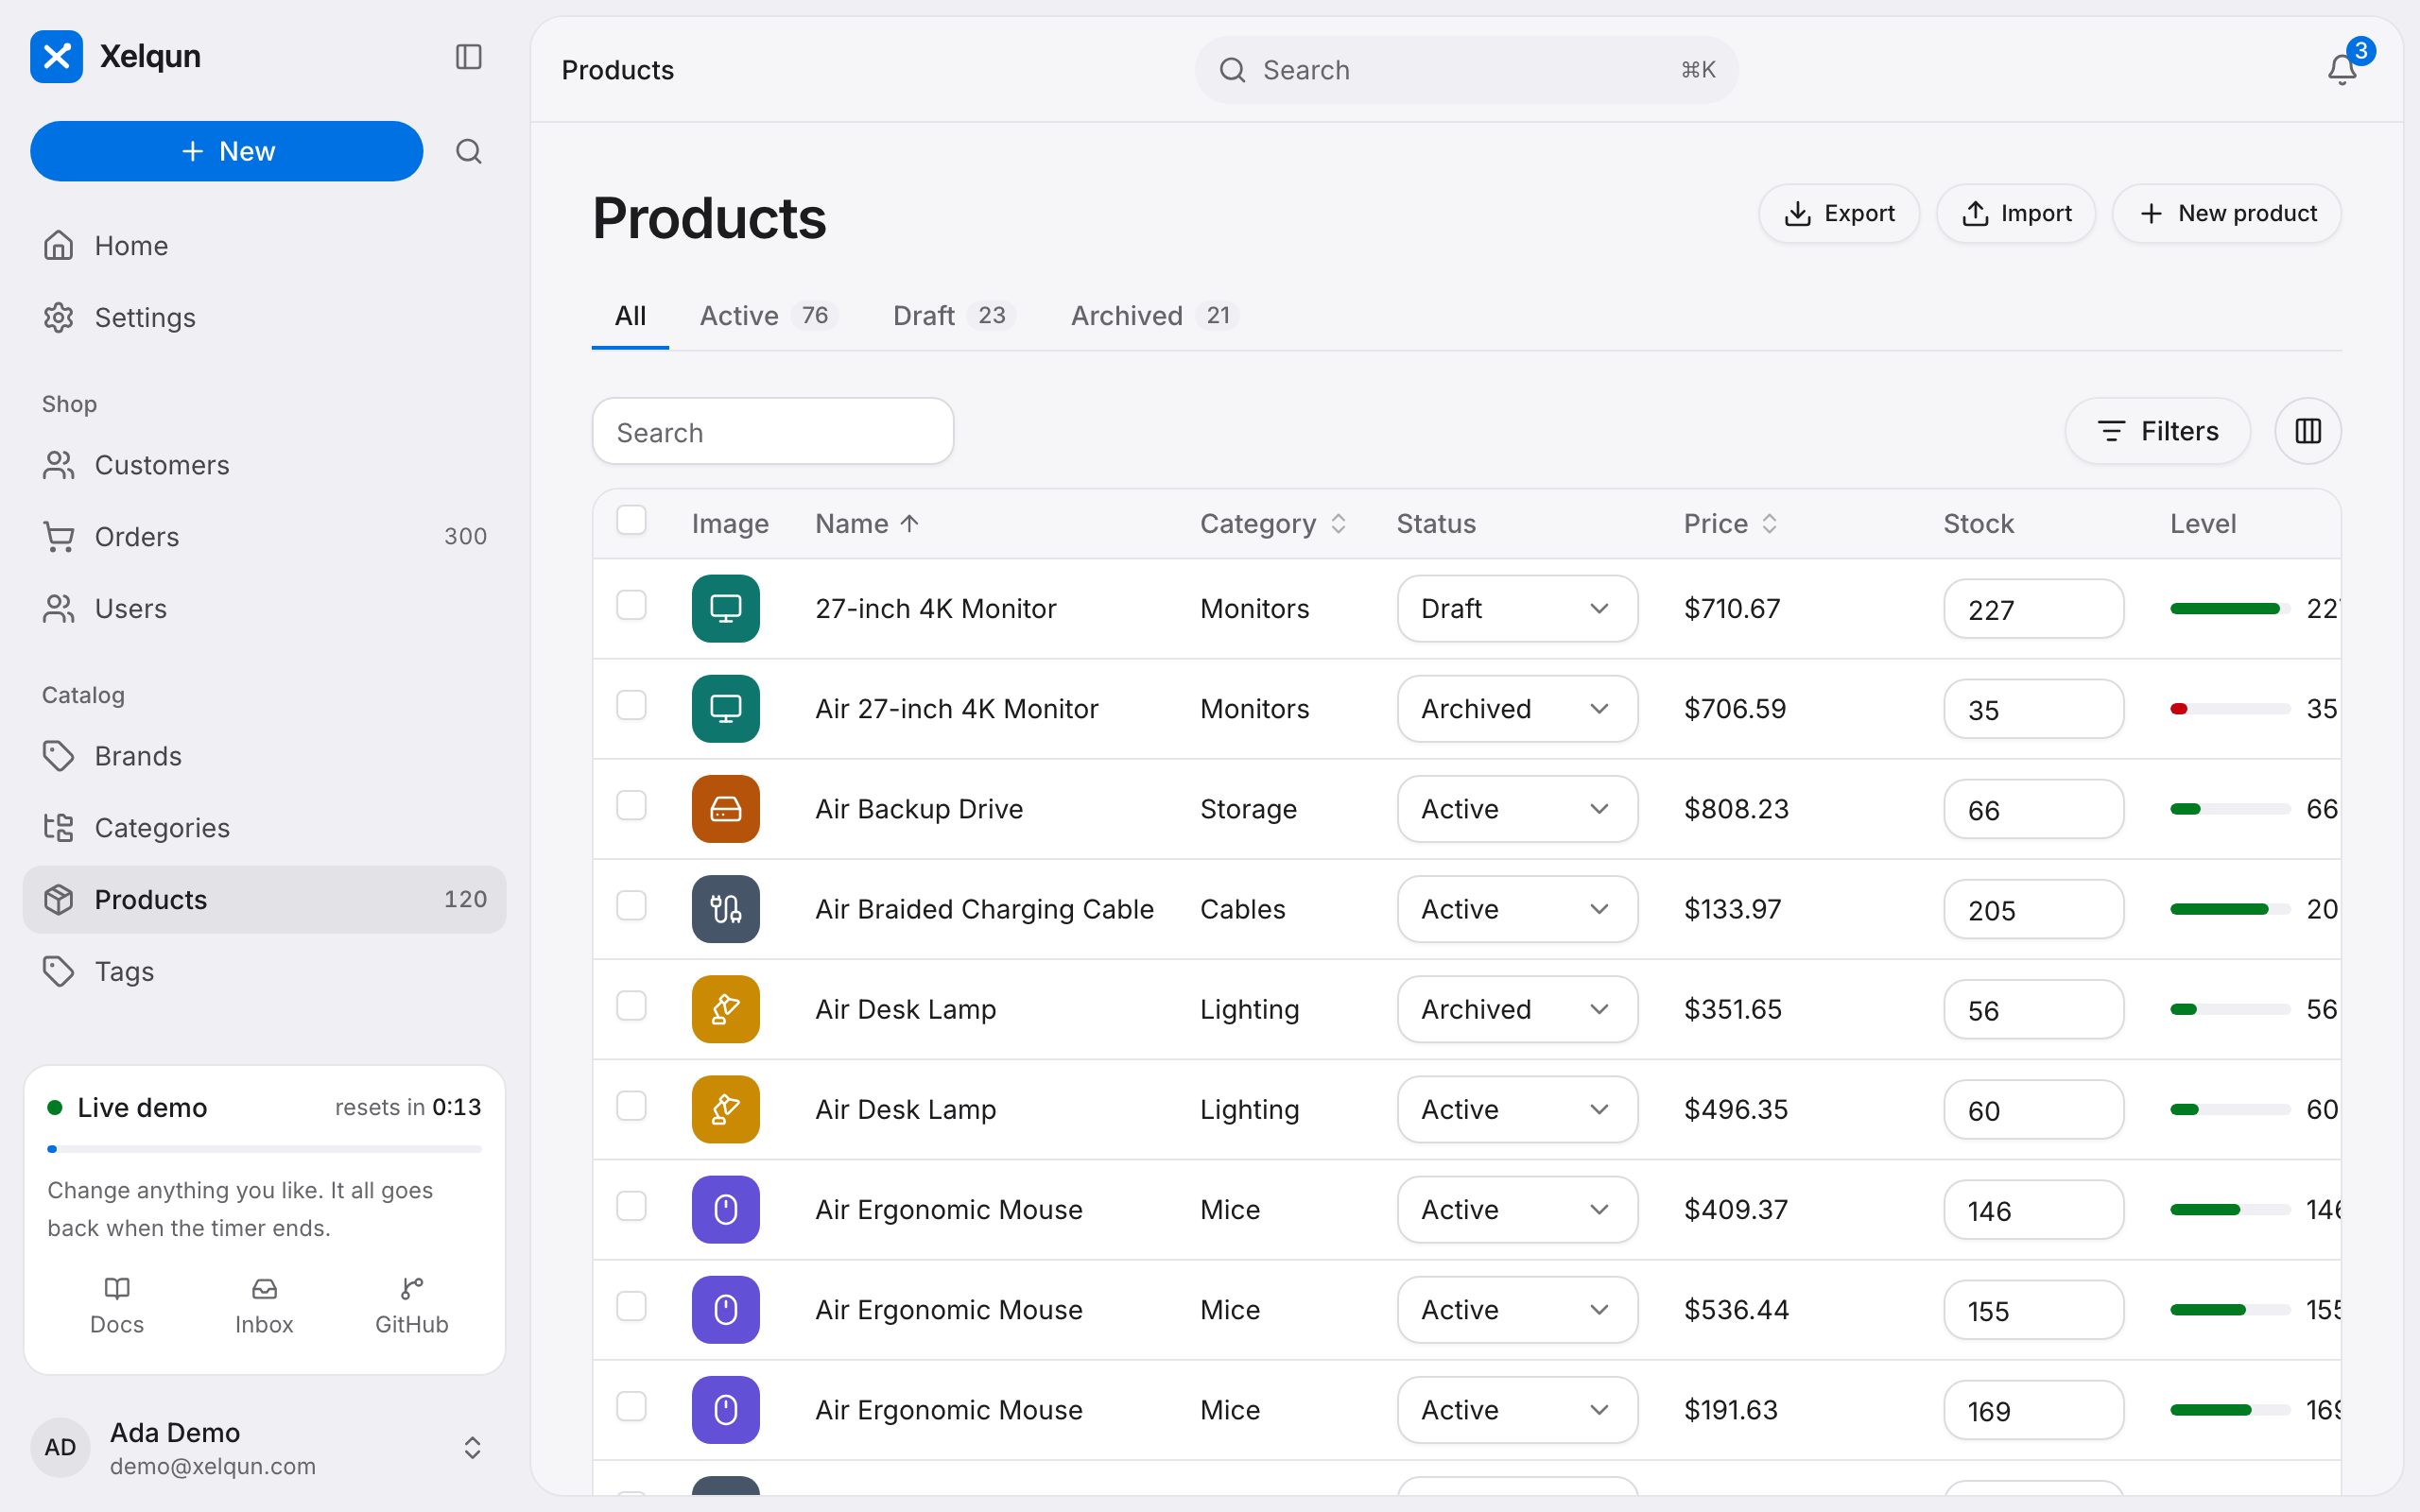
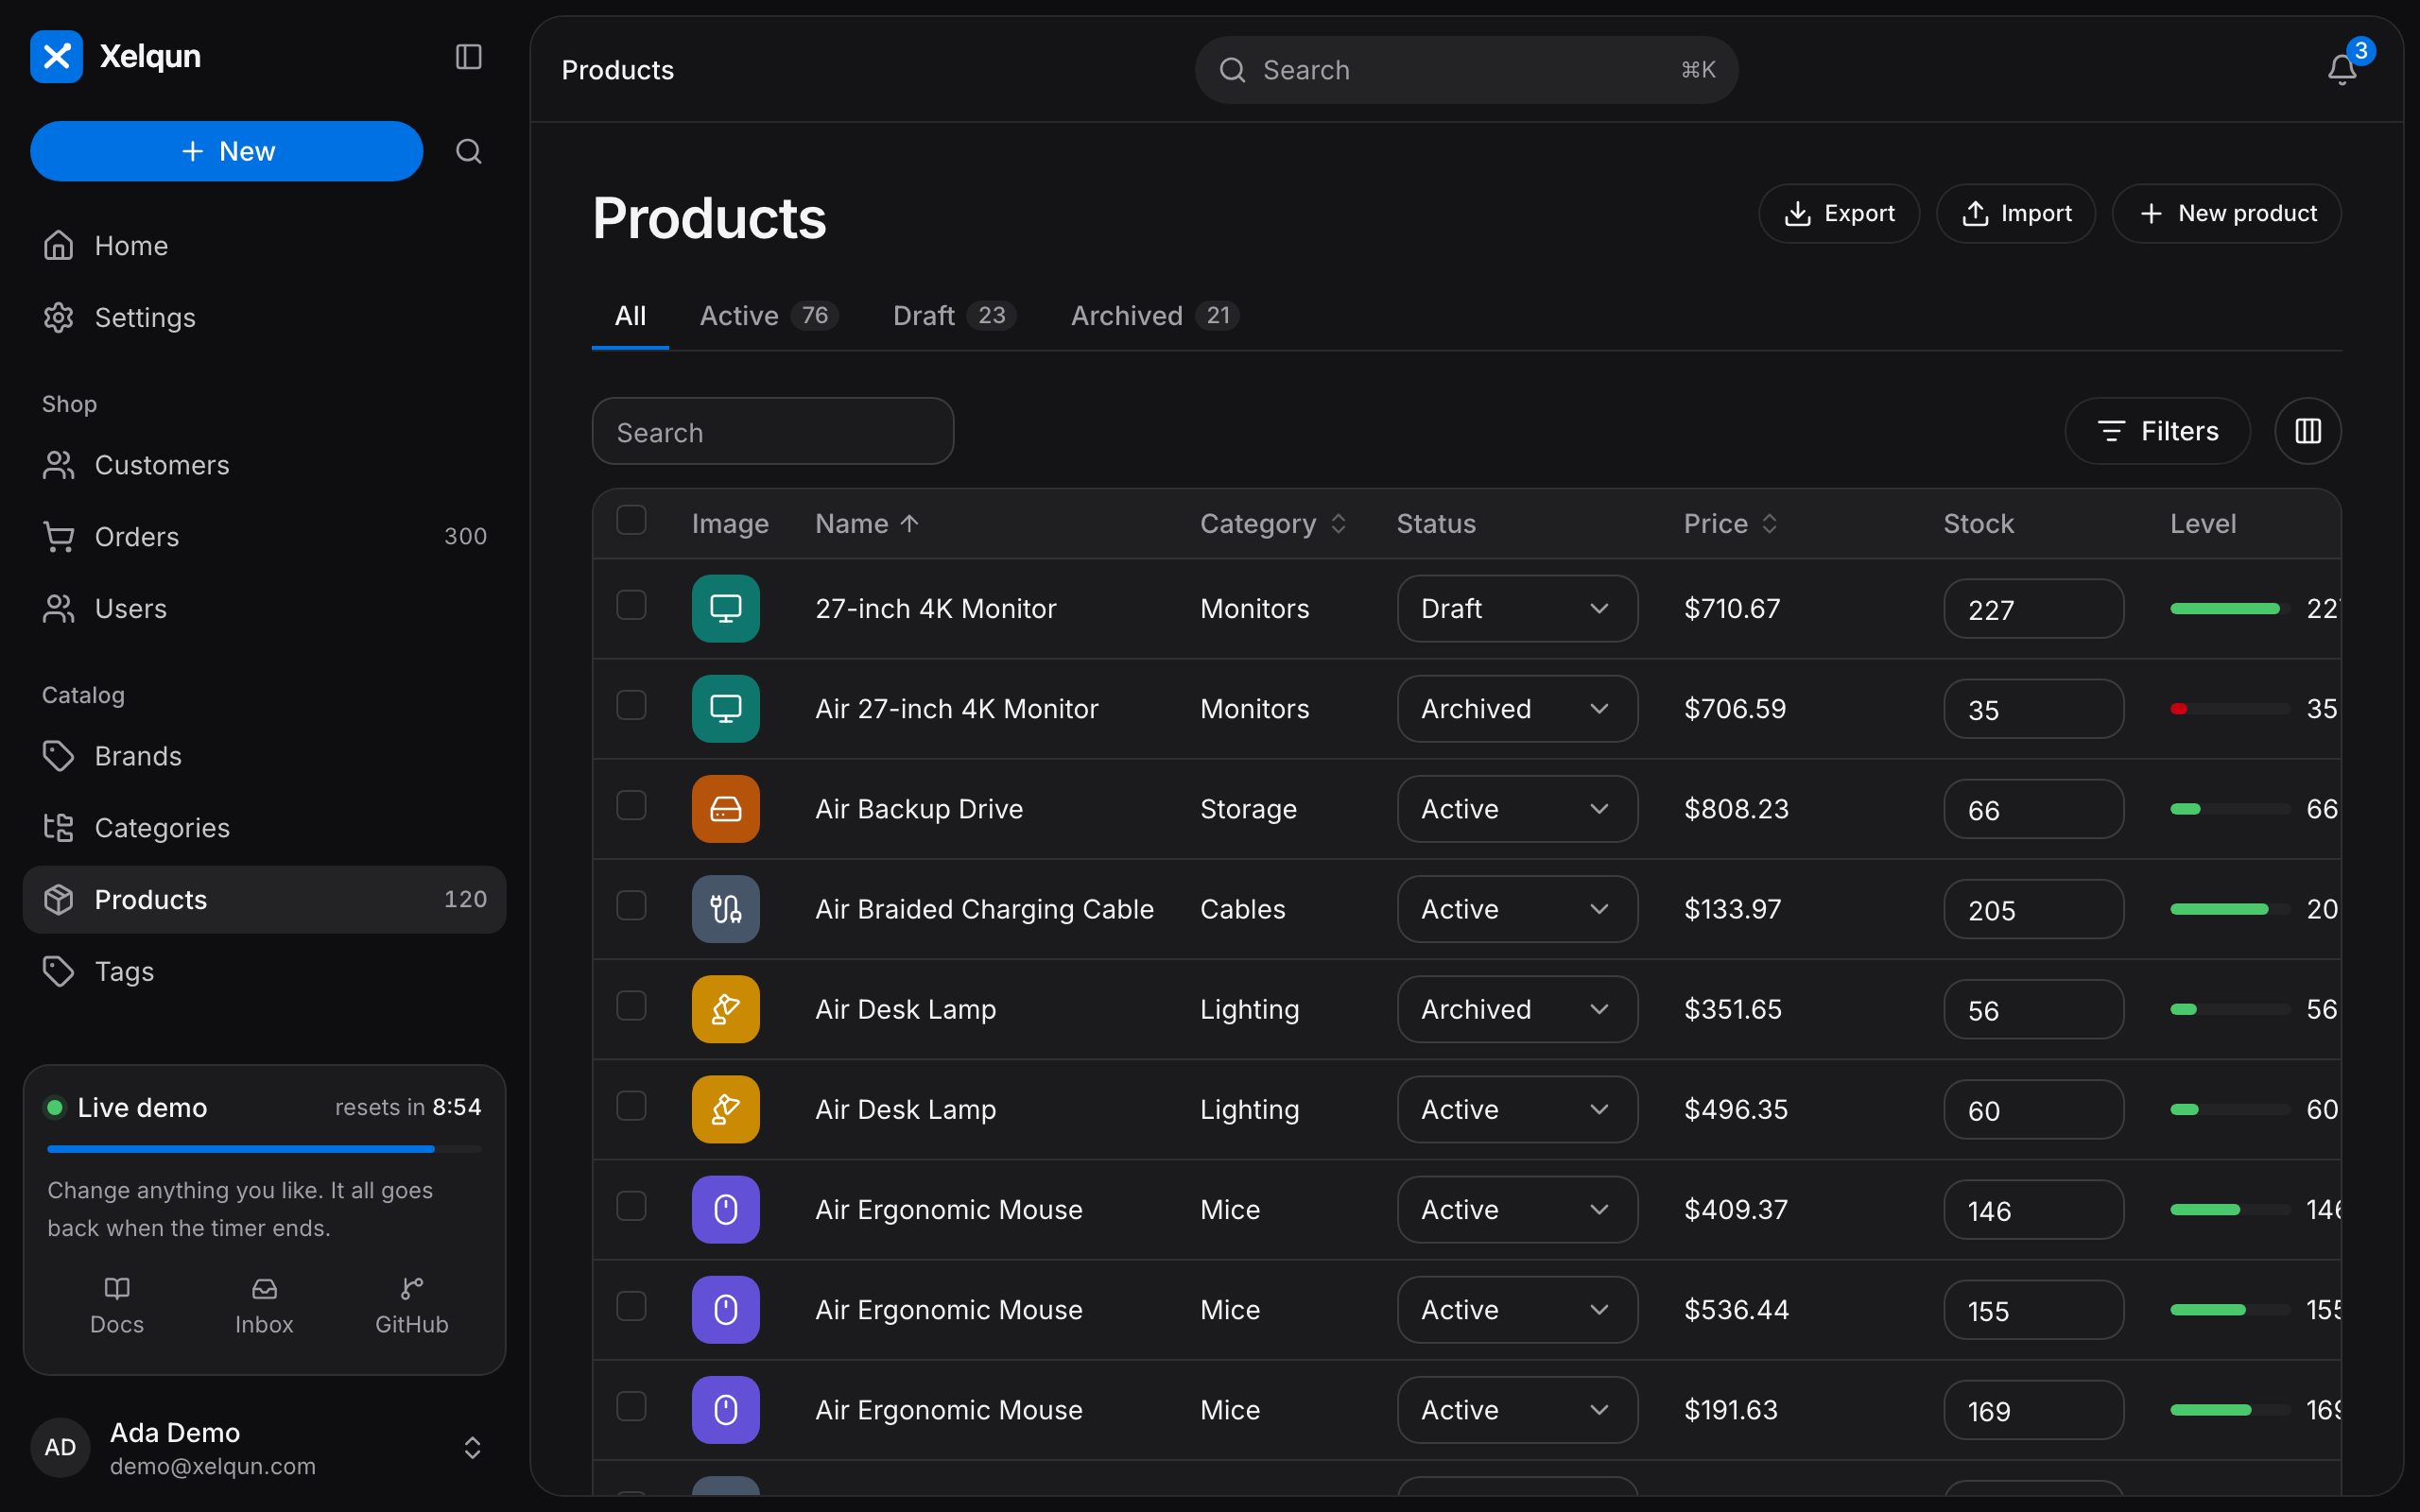
Open /admin/products, and you have search, sorting, and pages to create, edit, view and delete products. With more columns, tabs and filters, a list like this one from the demo isn't much more work.
Add a filter
filters() narrows the list.
use Xelqun\Tables\Filters\TernaryFilter;

public static function filters(): array
{
    return [TernaryFilter::make('is_featured')->label('Featured')];
}
Add a dashboard stat
Widgets fill the dashboard.
php artisan make:xelqun-widget ProductStats --stats
use App\Models\Product;
use Xelqun\Panels\Widgets\Stat;
use Xelqun\Panels\Widgets\StatsOverview;

class ProductStats extends StatsOverview
{
    protected function getStats(): array
    {
        return [Stat::make('Products', Product::count())->icon('package')];
    }
}
Add it to your panel with widgets().
$panel->widgets([ProductStats::class]);
Next steps
You've got the whole loop now: a model, a resource, a policy, a form, a table and a widget. From here:
- See every field and column
- Add relation managers for related records
- Set your colors and navigation
- Check the list before going to production